
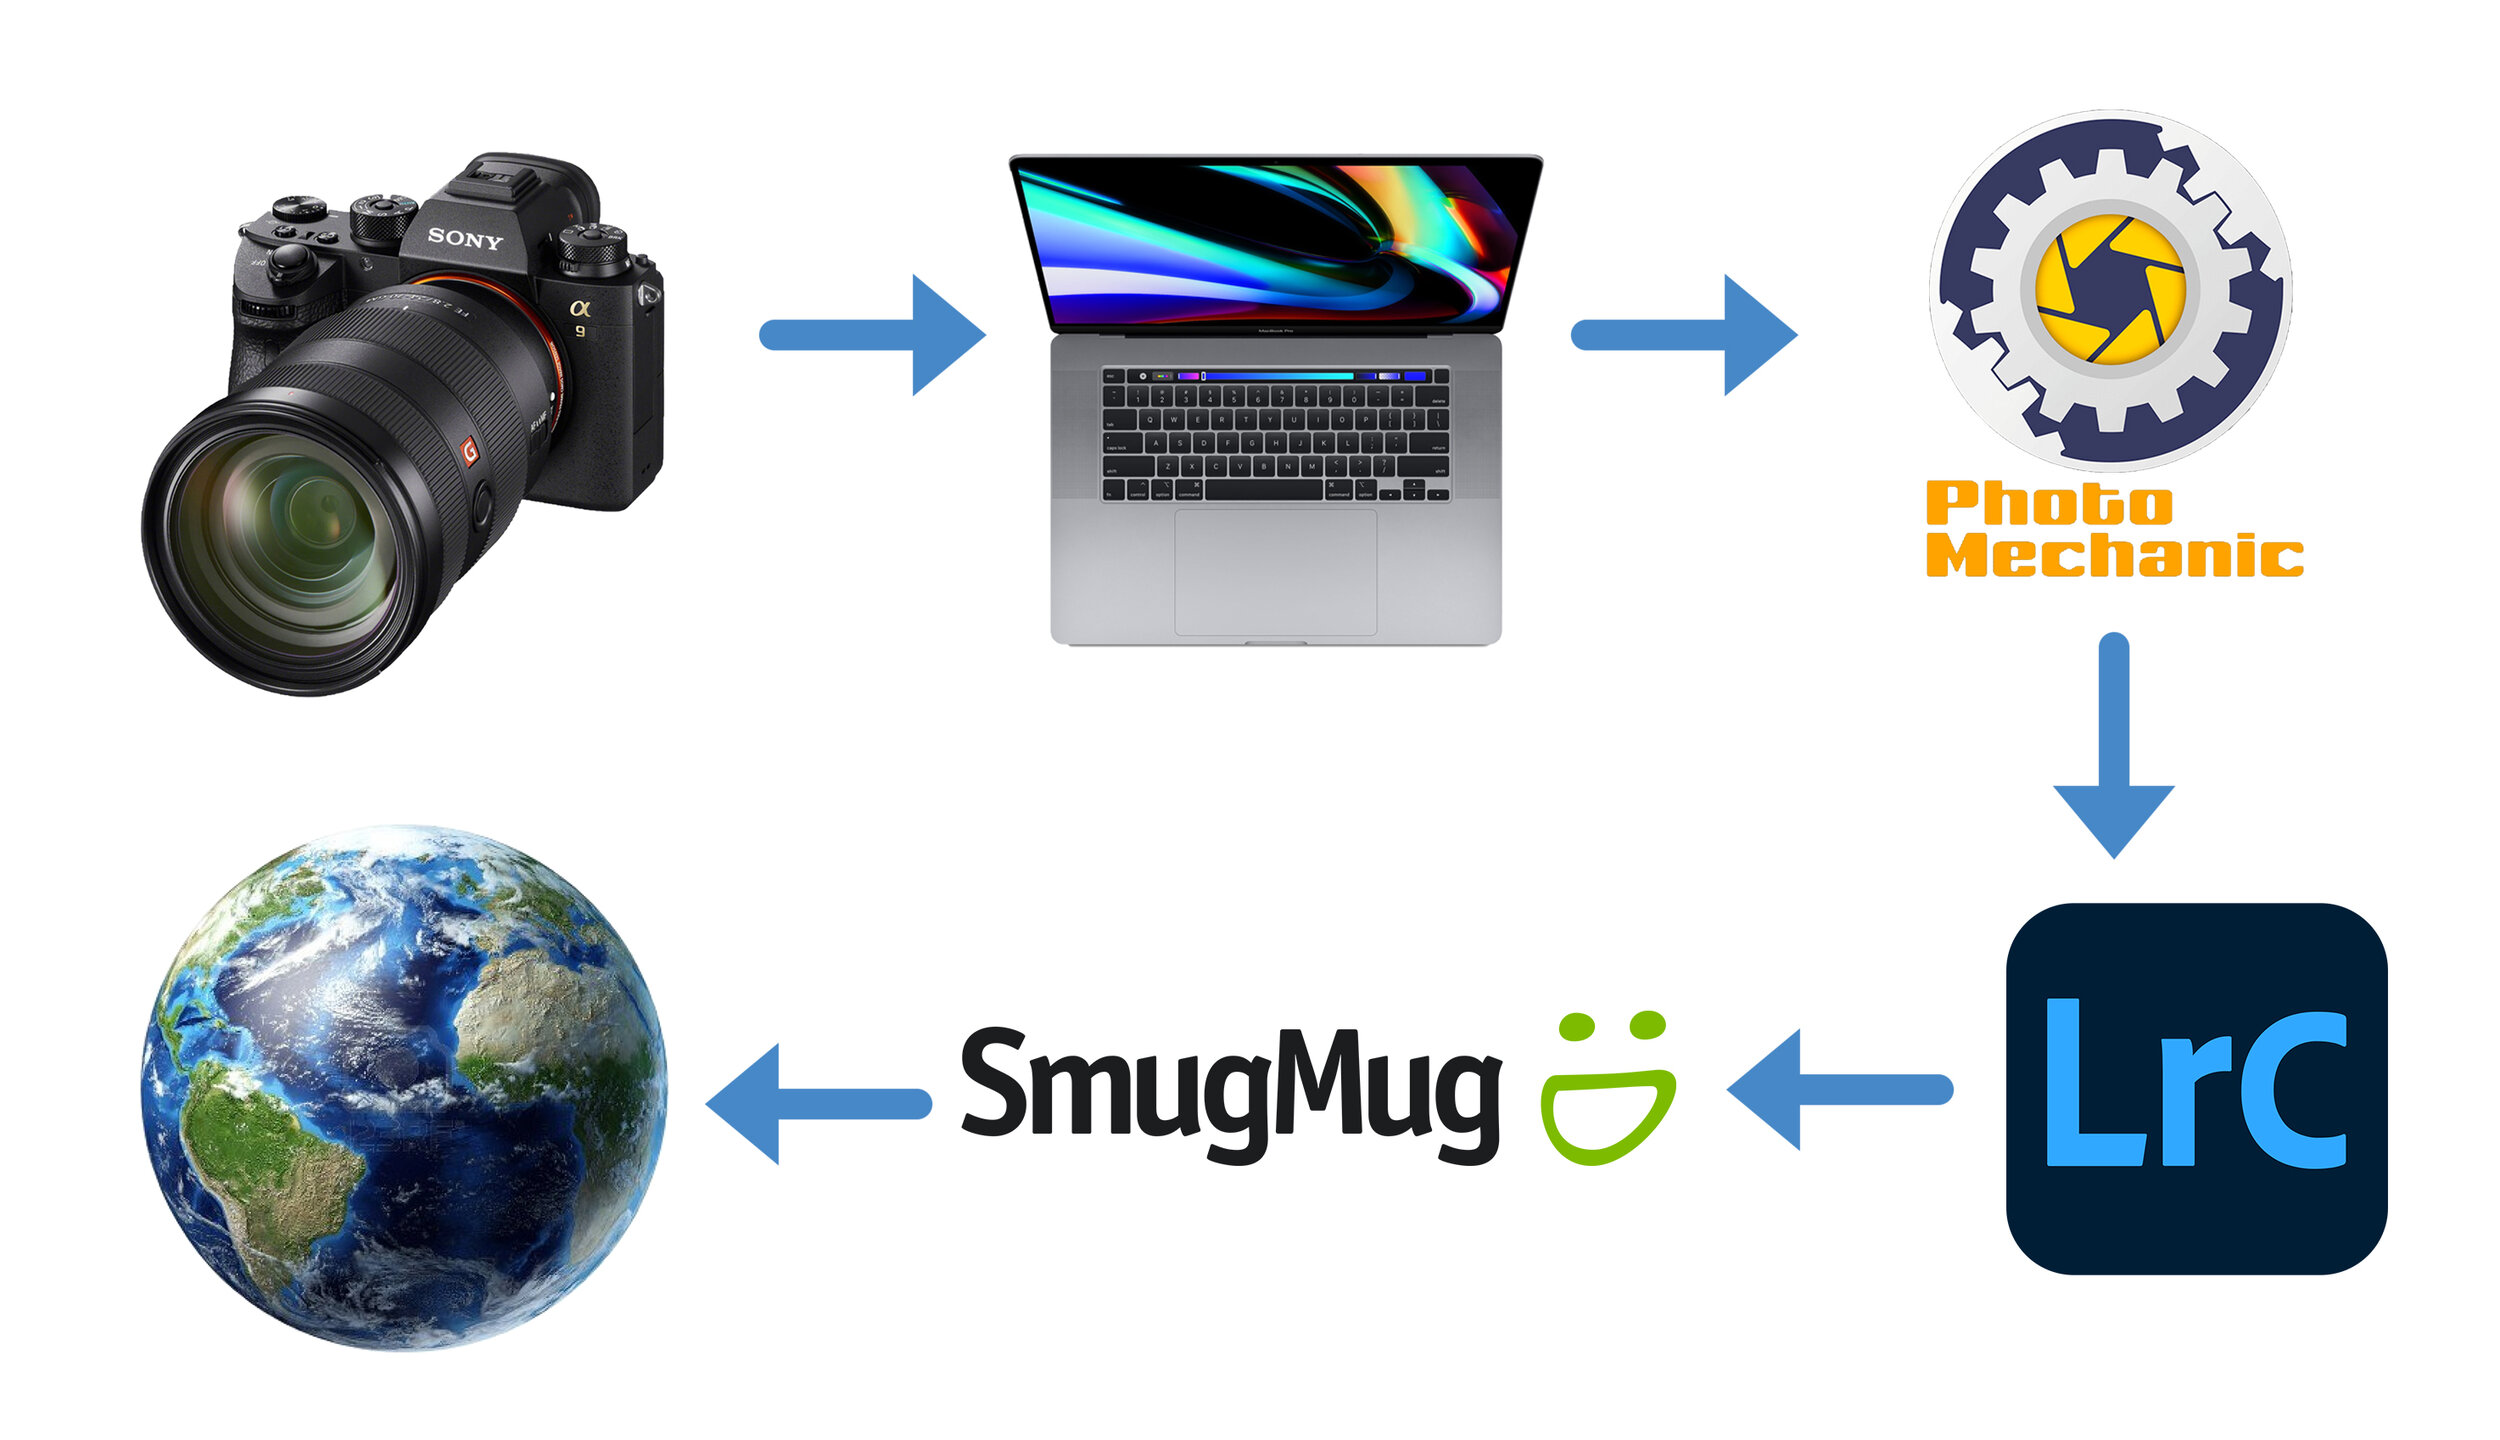
I’ve received several inquires recently from people frustrated with coming up with a workflow to get their images from camera > computer > edited > exported > shared.
Any workflow has to have three goals: Do it QUICKLY, do it RIGHT, QUALITY results. The best way to achieve all three is to (a) know your workflow and (b) have as much of the “busy work” set up prior to the shoot or game. Have your import template, metadata, folder system, export template, and graphic templates already set up before you even leave the house.
Quick note about Lightroom… some people use Lightroom as their library in that they keep hundreds of thousands of images on their computer and accessible through Lightroom. I am not one of those people. I simply use Lightroom as an import/editor/export workflow and once the project is complete, I remove images from Lightroom and burn a permanent archive on a Blu-ray Disc as well as have a cloud backup with SmugMug.

TEMP folder for each session/match.
In my Photos folder on my MacBook Pro, I have a TEMP folder with a series of folders within it. For each shoot, I duplicate the TEMP folder and rename it with the date and event (20200710 ____). The folder inside called “Rename Me” is given the same name as the event folder but with a space before the date so that it moves to the top of the folder.
For the majority of work I do, depending on how you view these, there are three or four different scenarios:
PROFESSIONAL - Working a game with support crew in the press box: editor, social media managers, etc. This would be how I work for a Nashville SC match.
HIGH SCHOOL GAME - Working a game with no support crew where I work multiple roles: photographer > editor > social media. This would be how I work for Christ Presbyterian Academy.
MEDIA DAY - I almost always shoot tethered in these situations
LOCATION SHOOT - Not shooting tethered and no immediate deadline, import images that evening at home
I’m going to run my workflow for a Nashville match - #1 above - and then include a variation if you do not use Photo Mechanic - #4 above.
Working a big game is just fun. It’s fantastic to have a great content team to work with where everyone plays a different role and having a big crowd in a big venue makes everything even better! I’m on the field along with the lead team photographer (Sierra), and usually a third shooter. Upstairs in the press box is the content team which selects images, edits them, imports them into graphics and puts them out on the various social media channels.
“If you’re a sports or wedding photographer, you need to get Photo Mechanic. Even if making selects is the only time you will ever use it, Photo Mechanic speed up your workflow considerably as the screen redraws are instant. Well worth $150.”
To get the images from my camera to them, in 2019, I sent them to my phone and uploaded to a SmugMug link to which everyone upstairs has access. While we only played one home match before things were shut down, the plan was to get both of us hotspots and FTP images directly from the camera to a PicDrop picdrop.de link. SmugMug is great but still does not have FTP capabilities.
It’s important to send the RAW file to one card and the JPEG to another and transmit the full res JPEG (6000x4000) to the server rather than the small embedded JPEG in the Sony a9/a9ii RAW file
During the game, each of us will usually send 50+ images out so content team has everything they need to tell the story of the night. We try to get images of every player on the evening as our SmugMug server is set up to populate each of the players links by using keywords so players will have images to post at the conclusion of each match.
After the game, I will import the RAW images into Photo Mechanic and make selections for the final images which will be uploaded to the team server as a permeant archive and later use.
WORKFLOW:
Import RAW images into Photo Mechanic (PM) and apply metadata template
Make selections in PM
Import those sections into Lightroom for cropping and a quick color and exposure correction. The Lightroom import is where I rename the images. The naming structure I use is YYYYMMDD Opponent/Event. You always want the year first followed by the month and the date last so everything will show up in chronological order.

Lightroom importing from Photo Mechanic
LIGHTROOM IMPORTING:
Use the MOVE feature on the import from PM
At the bottom, SORT: Capture Time **if you are using more than one camera, it is VERY important to make sure the internal clocks are synchronized. Make checking this part of your pregame routine.
FILE RENAMING: Check “Rename Files,” Template: Custom Name-Sequence (Custom Text, Sequence #1 [1] ), Custom Text: input your file name and the “sample” below will change accordingly
APPLY DURING IMPORT: Have an import template, which is set up to not overwrite any of the metadata which PM has embedded into the images
DESTINATION: Do not check “Into Subfolder,” Organize: Into one folder
LIGHTROOM EXPORTING
EXPORT LOCATION: Export To: choose folder later, Existing Files: Ask what to do
FILE NAMING: Rename To: Filename, Extensions: Lowercase
FILE SETTINGS: JPEG, sREG (Adobe RGB 1998 is also fine), Limit File Size To: 8000 K
IMAGE SIZING: Resolution 300 ppi

Lightroom export window with several different export presets in the left column.
WORKFLOW (without Photo Mechanic)
For those of you who do not use Photo Mechanic, here is a workflow for using Lightroom only.
Drag and drop your images on to your hard drive
Import them into Lightroom using ADD (not MOVE)
Make your selections using the star ratings
Filter in the lower RH corner: Rated only
Library module and view as grid (G)
Select all (Cmd-A)
Rename Photos (under Library menu bar)
Custom Name - Sequence
Go to Finder and drag and drop those renamed files into a different folder
To back to Lightroom and click on the question mark on the first file and locate the missing file. Lightroom will then move all of the other images into the new folder and you can delete the original RAW folder from Lightroom
There are “right” and “wrong” ways of doing thing but as with any creative workflow, some of it is going to be based on how you work and what you need. I hope this is helpful in getting you to a good starting point and from there, you can figure out what works best for you and your work.
JFW